


December 25, 2017
December 18, 2017
Funko Pop Christmas Tree
Last year we bought Christmas tree from boxing day sale to save it for this Christmas.
We would like to take our time to find ornaments that we like to hang, maybe one ornament each person, each year.
So because we don't have that many ornaments to start with, we decided to put our toy collection in good use so we're using Funko Pop instead!
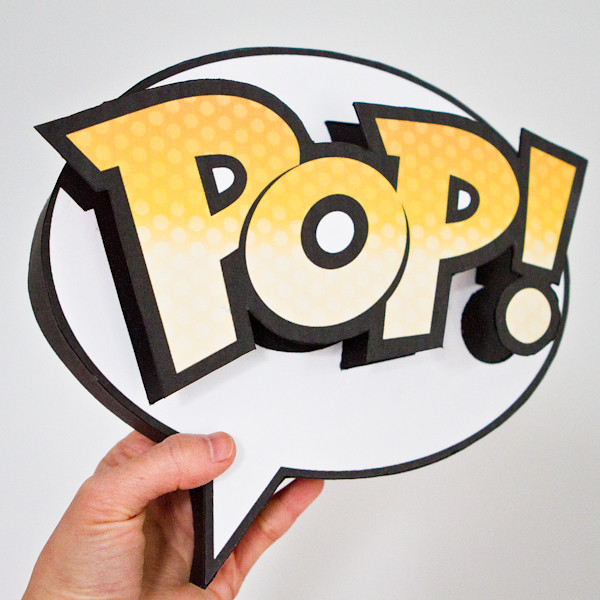
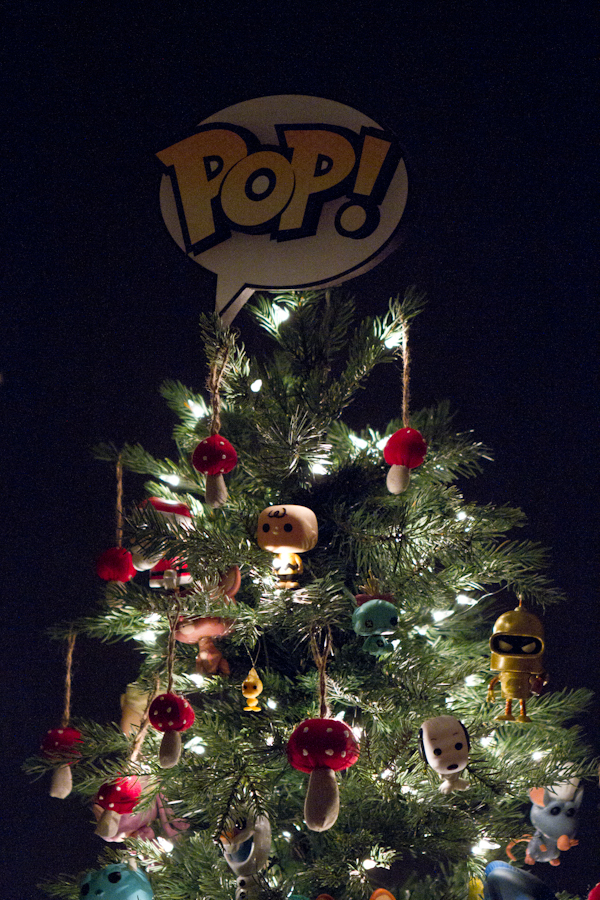
Then I had an idea to make paper crafted Funko Pop tree topper!
Materials:
- Funko Pop logo printed out (logo size: 25cm width)
- Cardboard
- Rubber cement glue
- Scissors
- X-acto knife
- Black paper
- Glue gun
- Craft wires or floral wires
- Black Sharpie marker
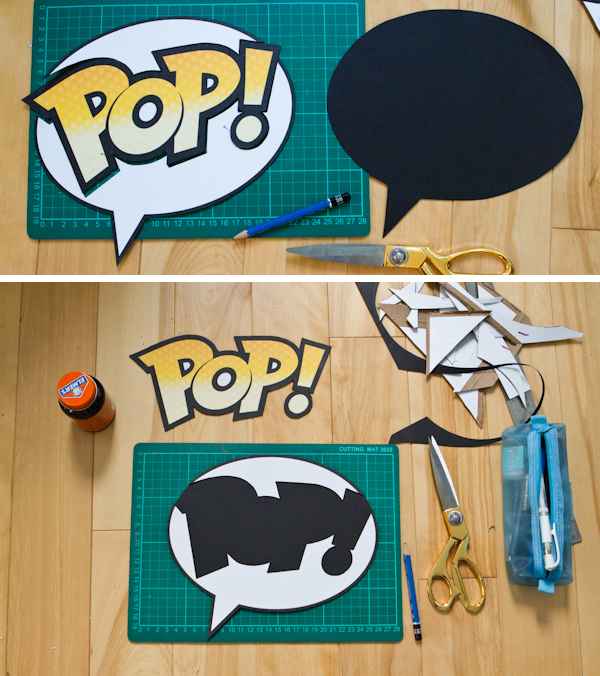
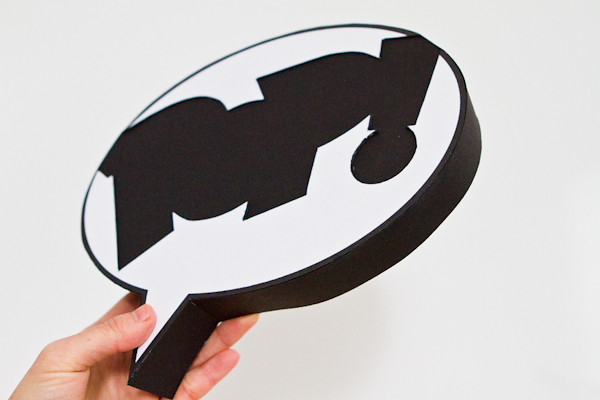
1: Glue together printed logo and cardboard with rubber cement glue. Cut out the shape when it's dried.
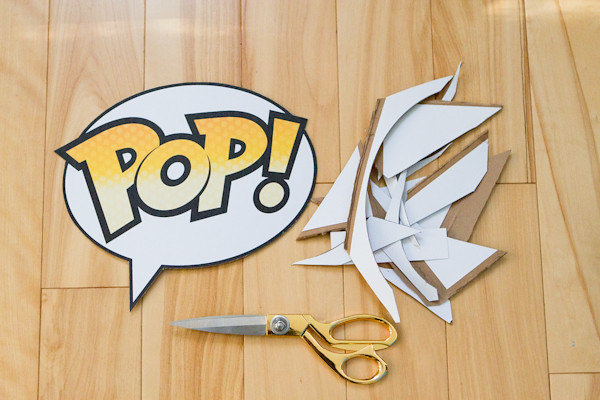
2: Cut out the "POP!" logo and dialog box.
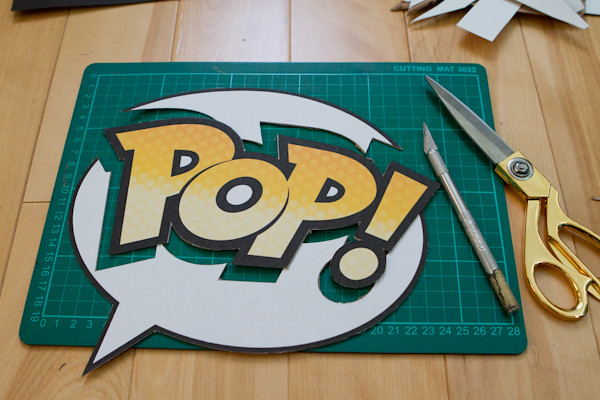
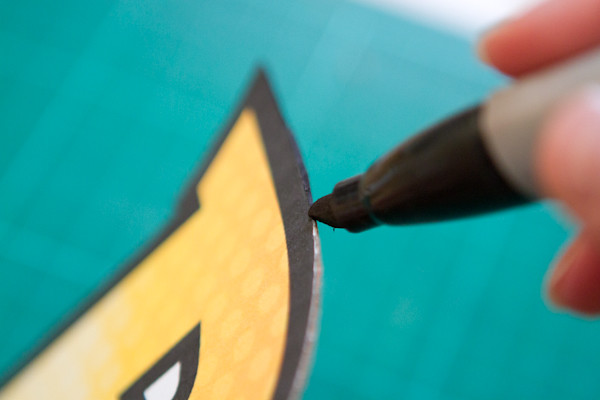
3: With black Sharpie marker, color in edges of the paper so you'll have cleaner and bolder edge finish.
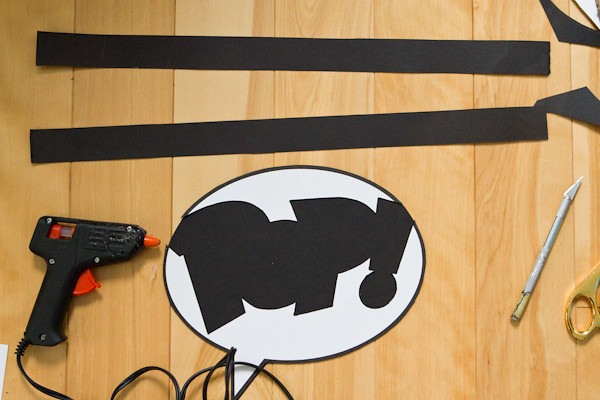
4: With black paper, trace out the dialog box. Then glue the white dialog box on the black dialog box.
5: Now to have 3d formed dialog box.
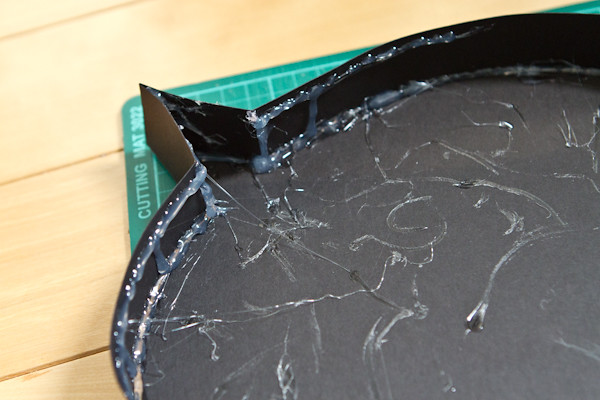
With strip of black paper(about 3cm thickness), you will wrap around the dialog box using glue gun to secure.
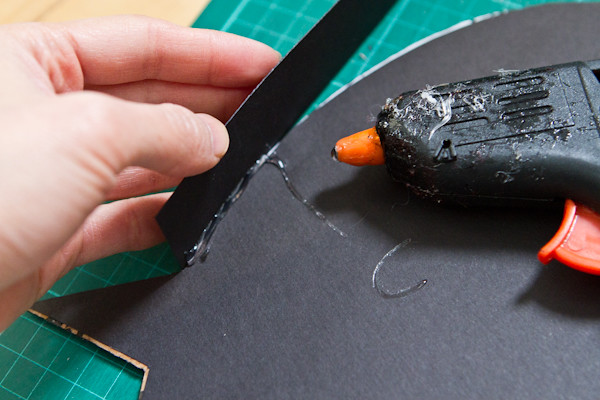
I take my time to secure it 10cm at a time.
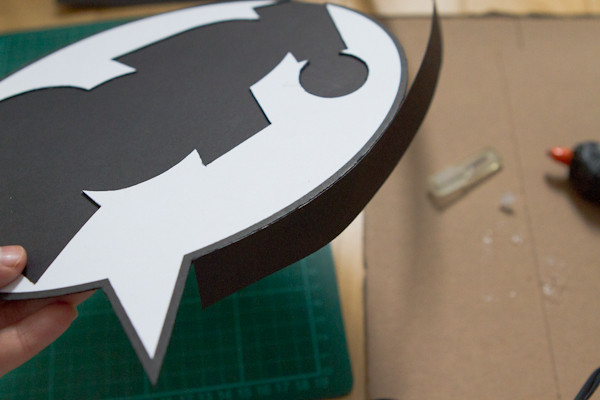
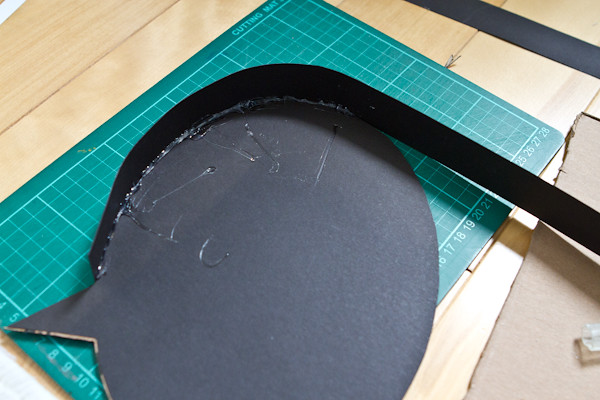
As optional step, you can use glue gun to draw out the wireframe so the trim will be tougher so the edge won't bend as easily.
Unless you're using thicker black paper then you can skip this step.
6: Now making a block to make the "POP!" logo pop out.
With any scrap paper, make a rectangle box(about 2cm thickness) and glue on top of the dialog box.
Do the same with the back so you have something to hook on to from the back.
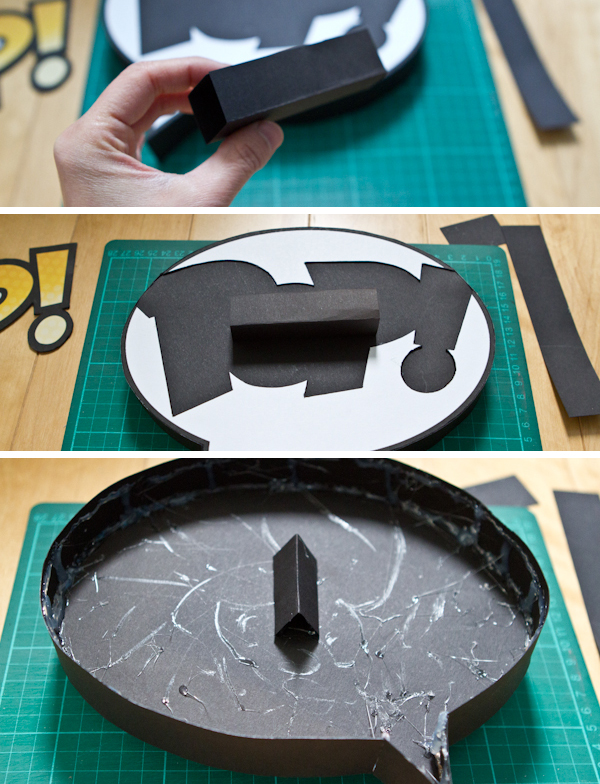
7: Now you can carefully glue the "POP!" logo on top of the block you made.
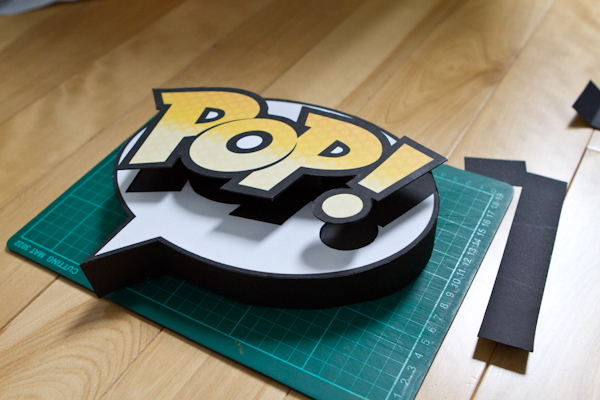
8: To hang it on the tree, I used floral wires and made into a hook to hang the logo. And to actually let it stand, I used paper clips to clip the wire to the toughest part of the tree branch to hold it still.
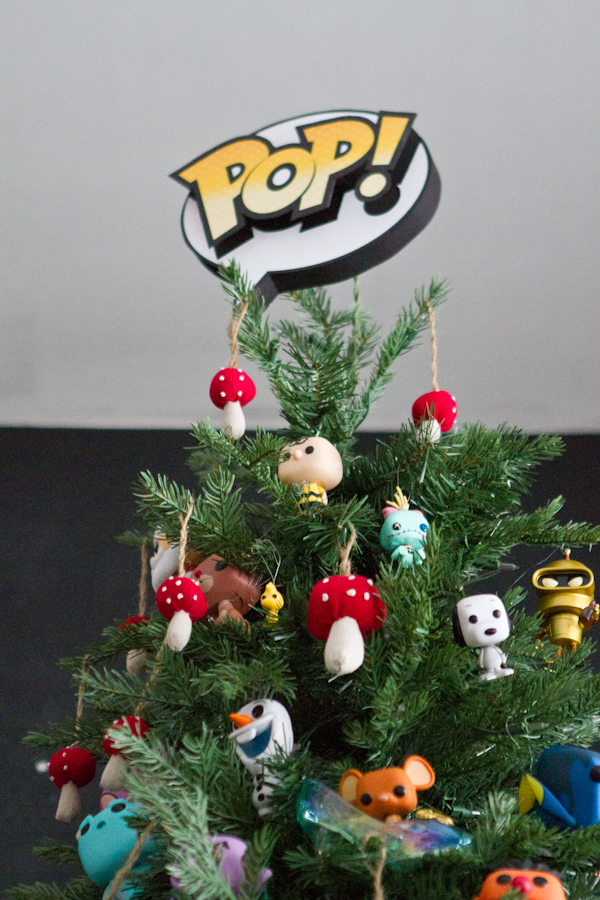
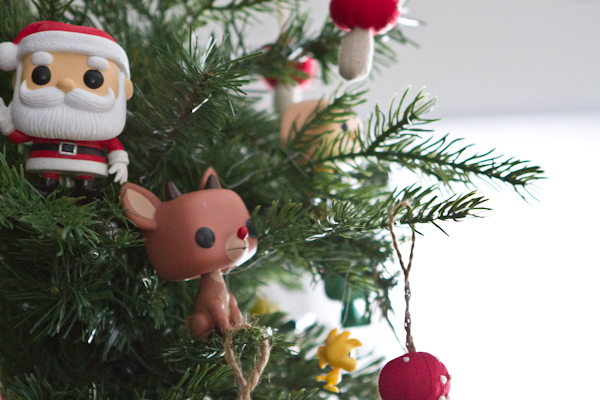
Here is our this year's Christmas tree!
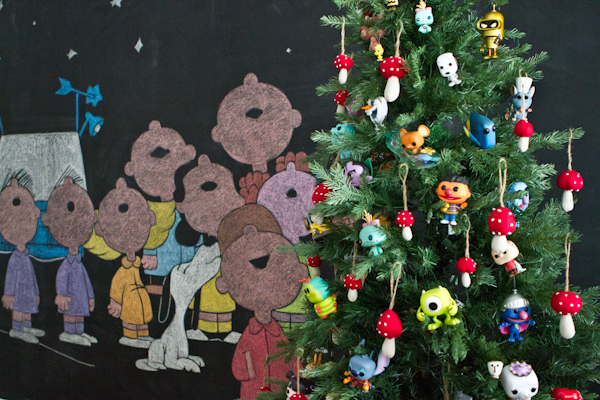
For Funko figures, we used wires to tie them around their neck and twist tie them on the branch. The mushrooms are from IKEA that I bought them long time ago.
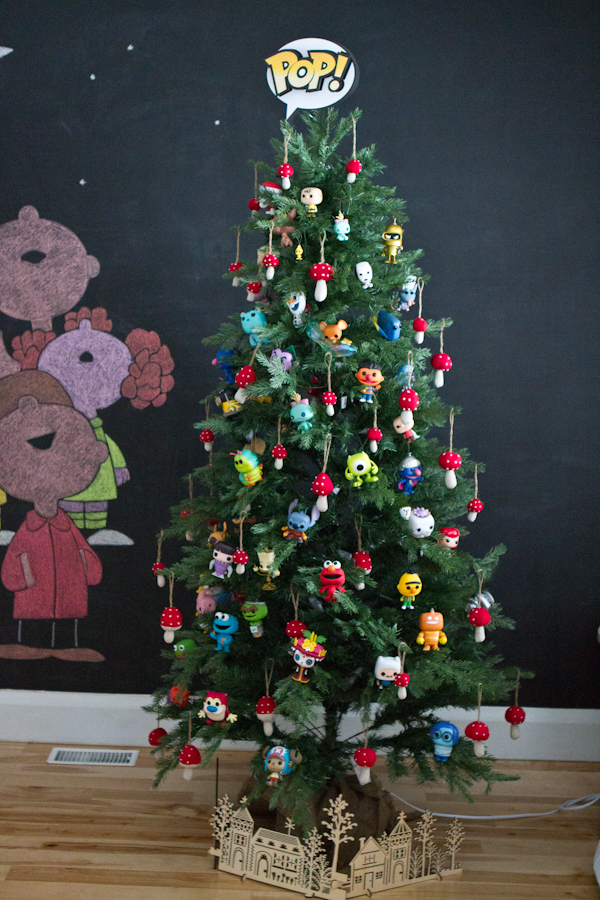
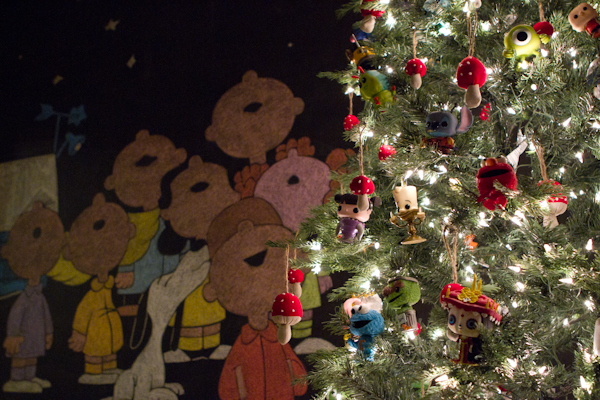
From last years of fun, Tim wanted to do classic Peanuts scene with this Christmas tree.
All hand drawn by him.


Hope everyone's having fun with their Christmas!
Happy holiday!!

We would like to take our time to find ornaments that we like to hang, maybe one ornament each person, each year.
So because we don't have that many ornaments to start with, we decided to put our toy collection in good use so we're using Funko Pop instead!
Then I had an idea to make paper crafted Funko Pop tree topper!
Materials:
- Funko Pop logo printed out (logo size: 25cm width)
- Cardboard
- Rubber cement glue
- Scissors
- X-acto knife
- Black paper
- Glue gun
- Craft wires or floral wires
- Black Sharpie marker
1: Glue together printed logo and cardboard with rubber cement glue. Cut out the shape when it's dried.
2: Cut out the "POP!" logo and dialog box.
3: With black Sharpie marker, color in edges of the paper so you'll have cleaner and bolder edge finish.
4: With black paper, trace out the dialog box. Then glue the white dialog box on the black dialog box.
5: Now to have 3d formed dialog box.
With strip of black paper(about 3cm thickness), you will wrap around the dialog box using glue gun to secure.
I take my time to secure it 10cm at a time.
As optional step, you can use glue gun to draw out the wireframe so the trim will be tougher so the edge won't bend as easily.
Unless you're using thicker black paper then you can skip this step.
6: Now making a block to make the "POP!" logo pop out.
With any scrap paper, make a rectangle box(about 2cm thickness) and glue on top of the dialog box.
Do the same with the back so you have something to hook on to from the back.
7: Now you can carefully glue the "POP!" logo on top of the block you made.
8: To hang it on the tree, I used floral wires and made into a hook to hang the logo. And to actually let it stand, I used paper clips to clip the wire to the toughest part of the tree branch to hold it still.
Here is our this year's Christmas tree!
For Funko figures, we used wires to tie them around their neck and twist tie them on the branch. The mushrooms are from IKEA that I bought them long time ago.
From last years of fun, Tim wanted to do classic Peanuts scene with this Christmas tree.
All hand drawn by him.
Hope everyone's having fun with their Christmas!
Happy holiday!!
December 11, 2017
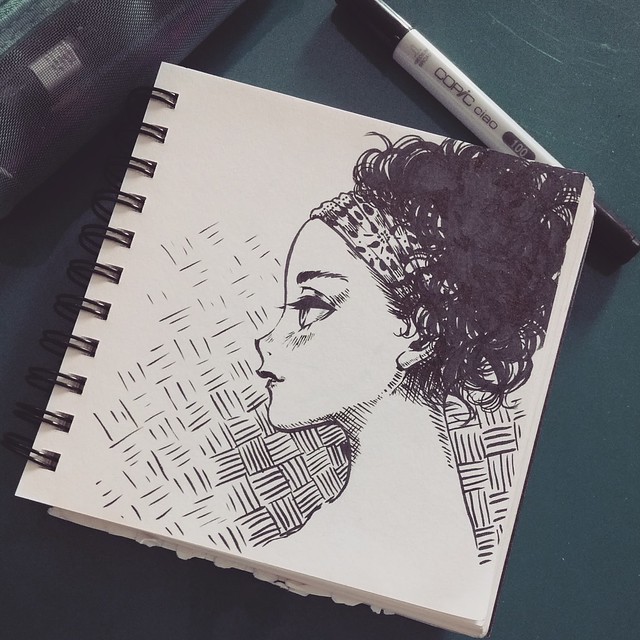
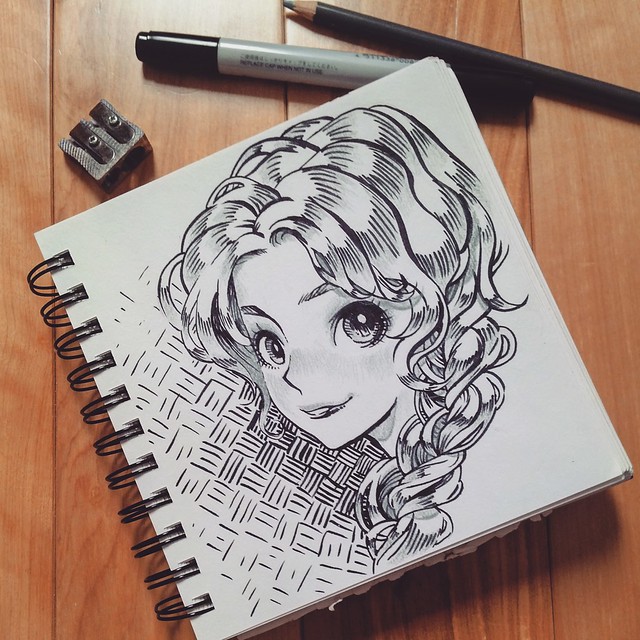
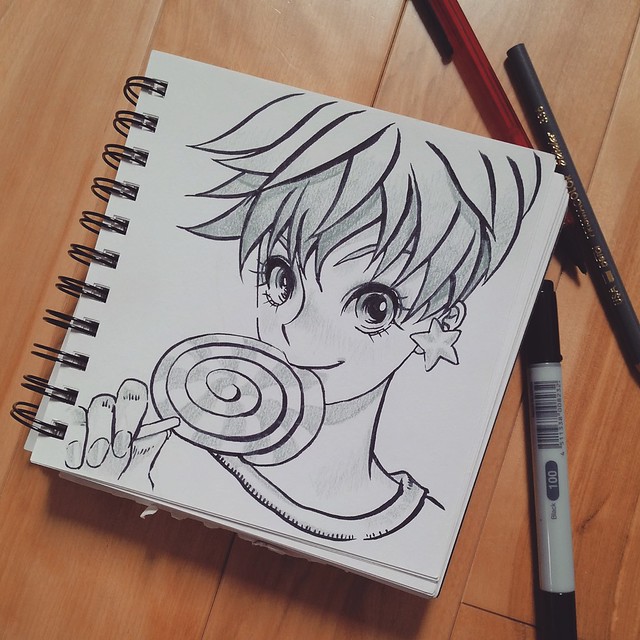
2017 Sketches Part 1
Started another sketchbook to complete!
I tried out using Copic's brush marker for the first time. I'm enjoying using the combination of brush marker and pencil crayon to do the shades.

I tried out using Copic's brush marker for the first time. I'm enjoying using the combination of brush marker and pencil crayon to do the shades.
December 5, 2017
Outfit Inspiration 20
It's time of month where you need to decide what to wear on Christmas parties!
Here is one example with one simple black dress but have multiple colors of tights that you can alternate. With new hair style and change your necklace, you get a new outfit each time.
I got away with this one black dress for 8 years.
fcuk: black dress / Target: tights- red, turquoise, mustard yellow / Necklace: purl necklace, bronze layered necklace / Shawl: gift from India / Nine West: heels
December 3, 2017
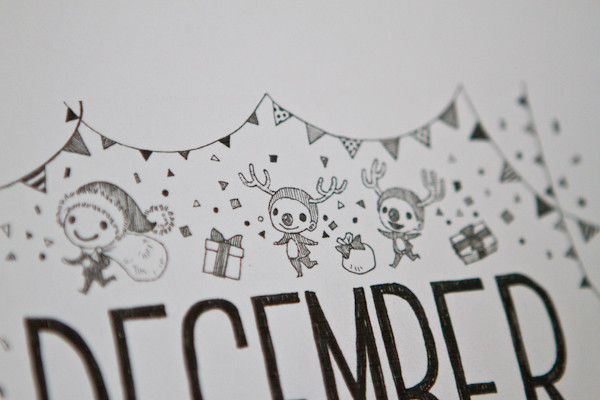
December Calendar
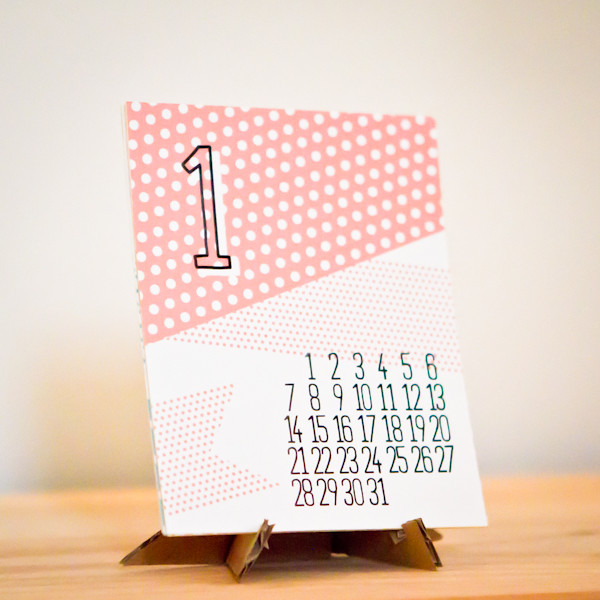
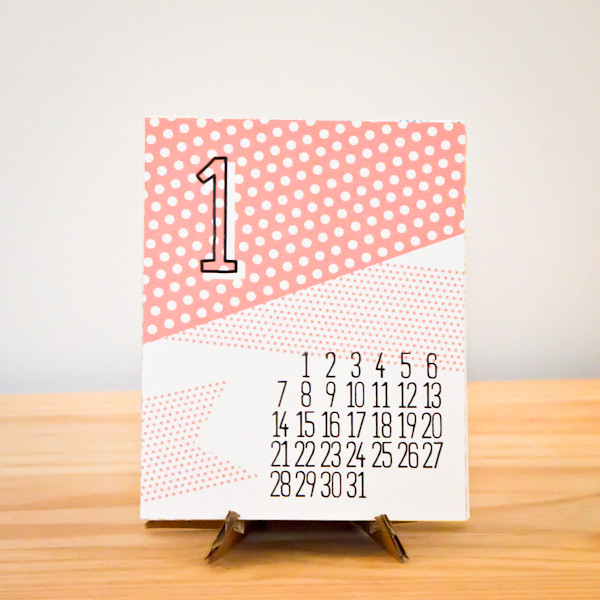
December is already here!
From this year's 2017 Calendar that I made for Etsy, I posted downloadable calendar for December to do your Christmas and New year countdown.
You can hang it on the wall,or at your office and markdown your plans!
Download here now!


From this year's 2017 Calendar that I made for Etsy, I posted downloadable calendar for December to do your Christmas and New year countdown.
You can hang it on the wall,or at your office and markdown your plans!
Download here now!
November 26, 2017
Mini Calendar 2018
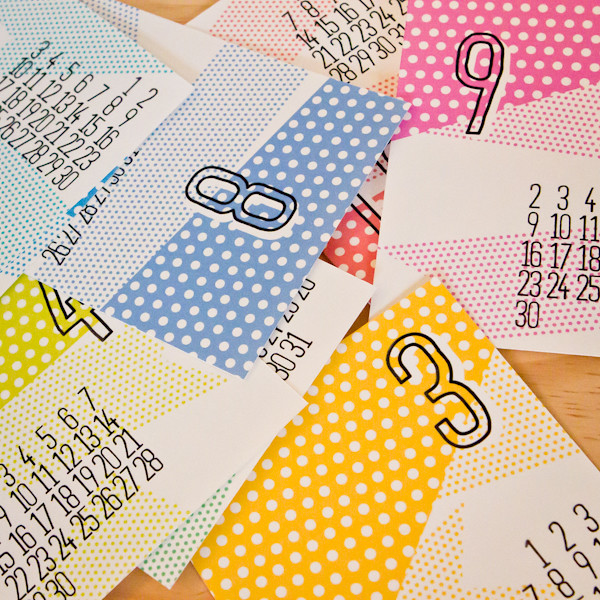
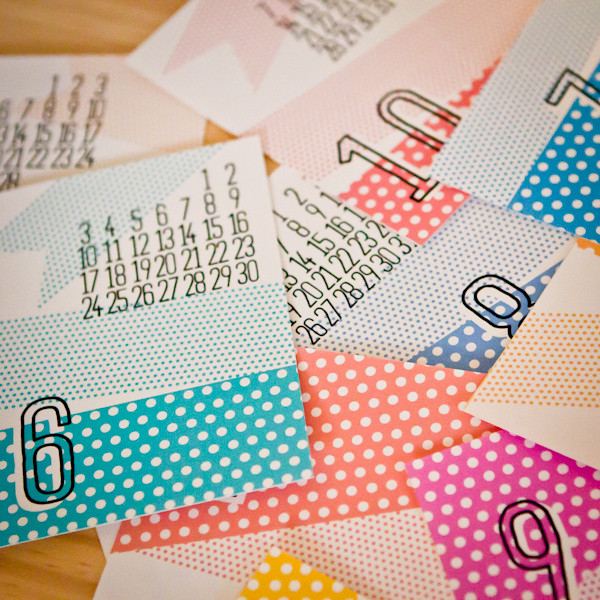
Here is printable 2018 mini calendar on Etsy!
I love collecting Japanese washi tapes, especially that has polka dot pattern. So this time the design is inspired from that washi tape.
Lettering is designed and handwritten by me too!
Purchase now here:
I love collecting Japanese washi tapes, especially that has polka dot pattern. So this time the design is inspired from that washi tape.
Lettering is designed and handwritten by me too!
Purchase now here:
November 19, 2017
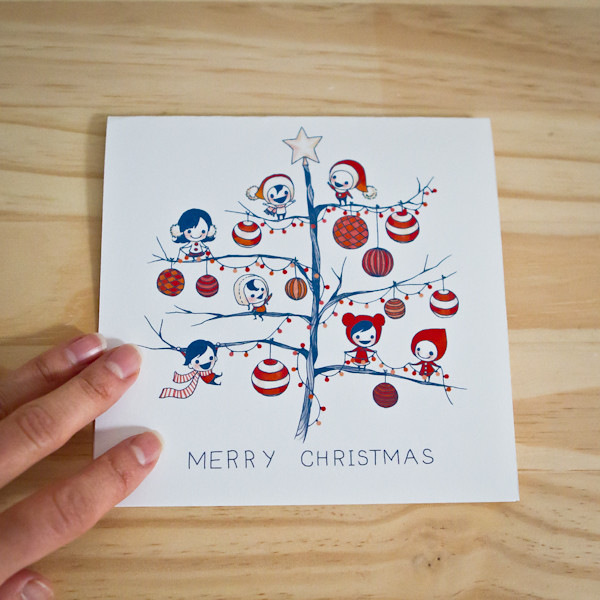
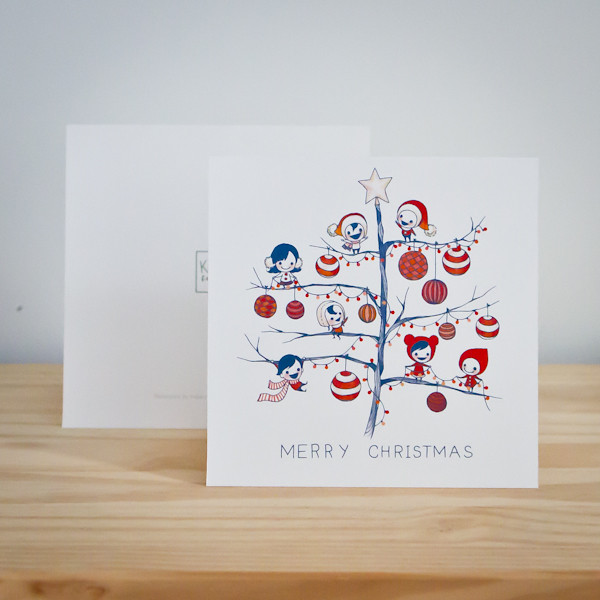
Etsy Shop: Christmas Card
Added new item at my Etsy shop!
Downloadable Christmas card illustrated and handwritten by me.
Click here to shop this card:

Downloadable Christmas card illustrated and handwritten by me.
Click here to shop this card:
October 29, 2017
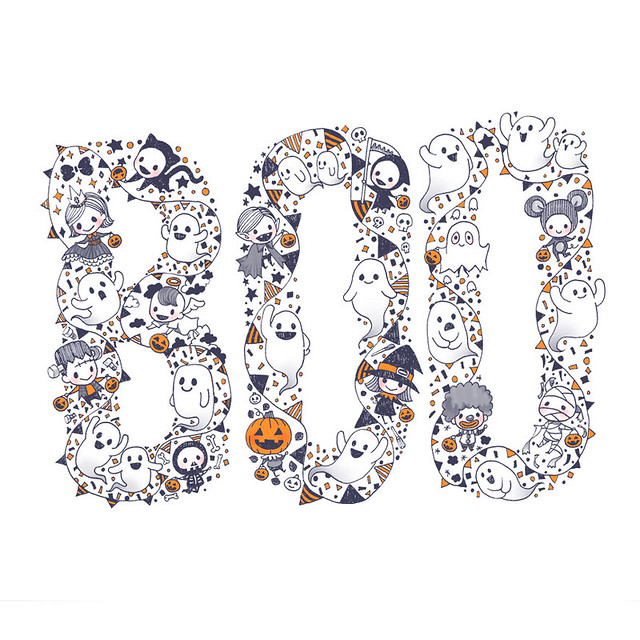
BOO
Happy Halloween everyone!
Works been taking up my time recently so I couldn't get a chance to do pumpkin carving this year. Still have 2 more days, maybe I can still squeeze it in?
Illustrated kids dressed up for Halloween and carrying their little, jack-o-lantern, trick or treating basket.
What's next? You can follow me at my Instagram to see progress of this work!
Here is short video of inking.
October 23, 2017
Apple Head
This is a project I've been wanting to do for very long time!
I generally don't like to show my face in public so I've been wanting to make a coverup mask for any photos that I'm in.
Originally I wanted to do papercraft apple head where I was ready to make. But luckily I found another alternative to make this apple head!
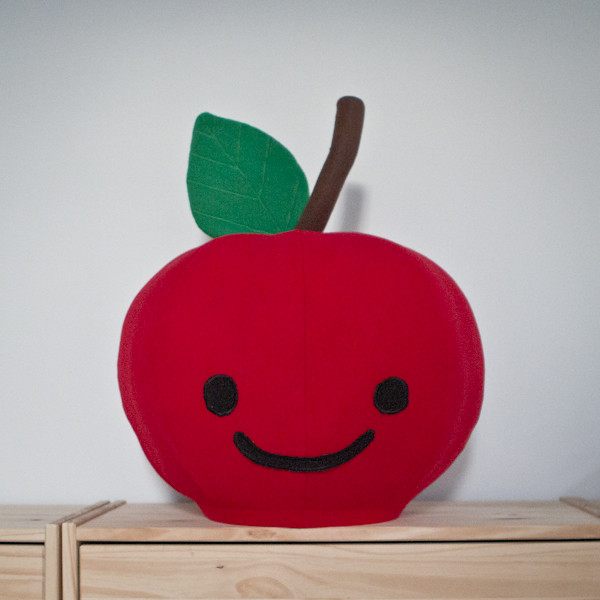

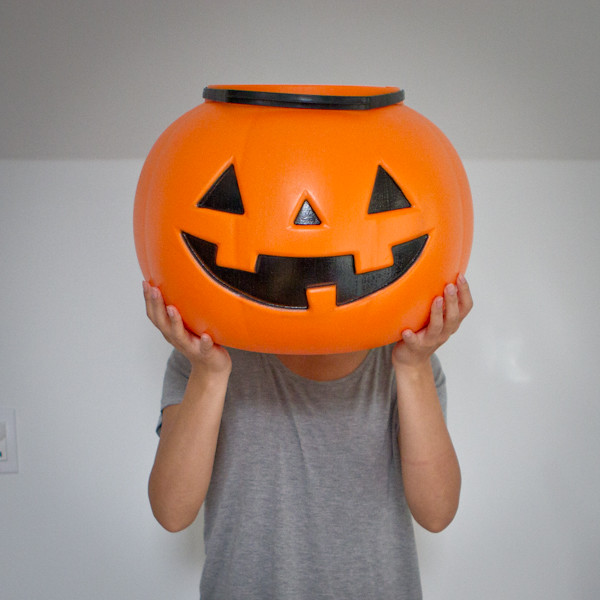
I found this jack-o-lantern bucket at Target for $6US.
The bucket hole can fit through my head so this was perfect bucket to make apple head project!
Materials:
- 1m red fabric
- 1/2m green fabric
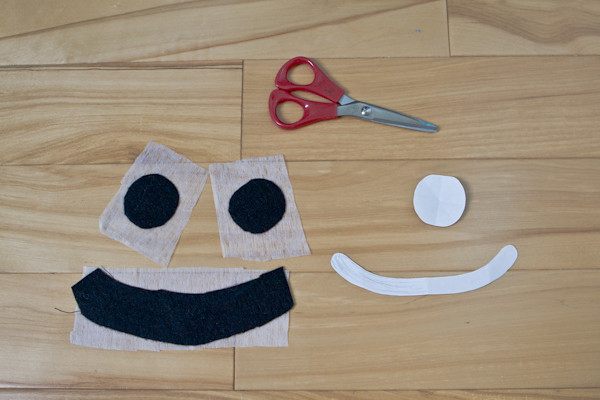
- 1 sheet of black felt
- 1 sheet of brown felt
- 1 jack-o-lantern treat bucket
Other materials:
- sewing machine
- stitching needle
- sewing thread
- fabric adhesive sheet
- craft wires
- power drill
- glue gun
- x-acto knife
- fabric chalk
- paper clips
- cotton

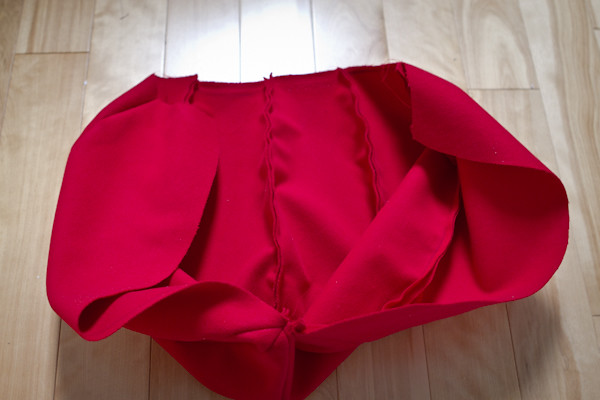
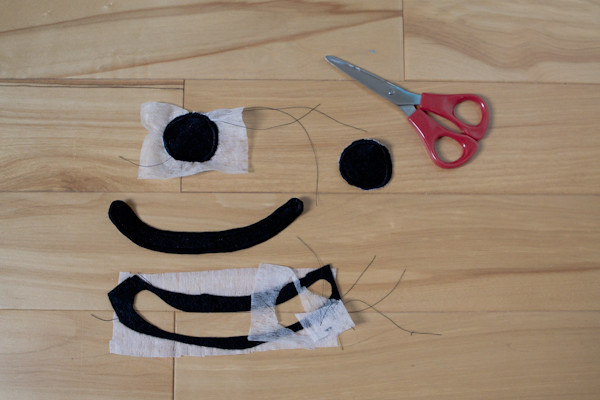
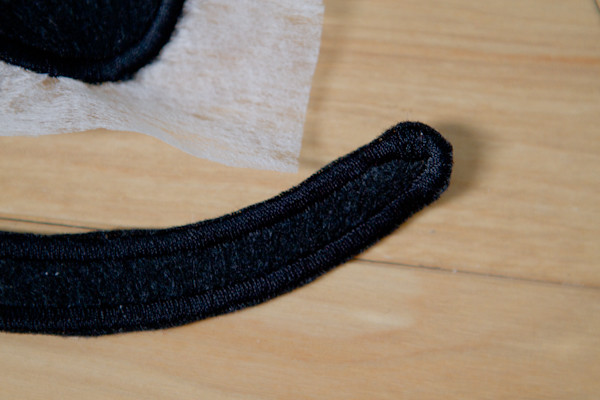
To make sphere, I had 8 pieces of flower petal shape and sewed together. I made up the pattern so I had to constantly check if it was wrapping correctly.
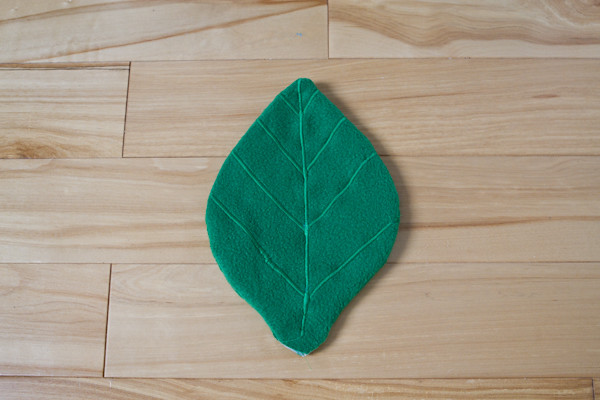
Have 2 cut outs of leaf shape.
Used fabric adhesive sheet on green fabric, drew and stitched to mark where I want the embroidery to be.
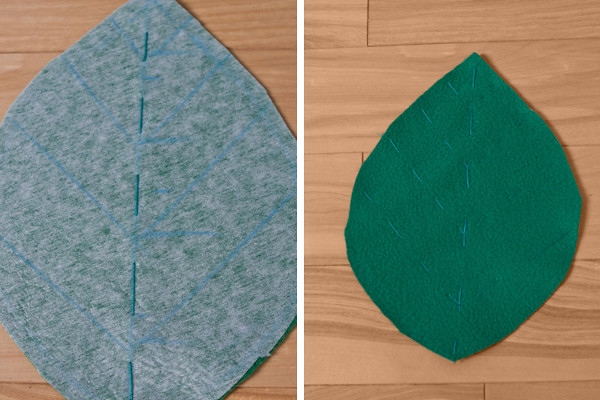
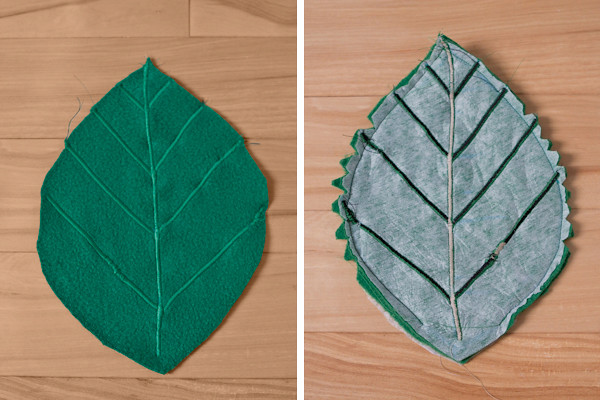
Left Image is the final result of the stitchery looks like, following the marking earlier. I used the default zig-zag stitch setting on sewing machine so some area looks wonky.
Right Image is when 2 pieces of leaf stitched together and how the embroidery looks like from the back side.
I used craft wires to keep the form without crushing it. The wire I used was super soft flexible wires so they will snap if you keep bending it on same spot few times.
I would recommend to put any wire through these stem and leaf so you have full flexibility to adjust when you put everything together.
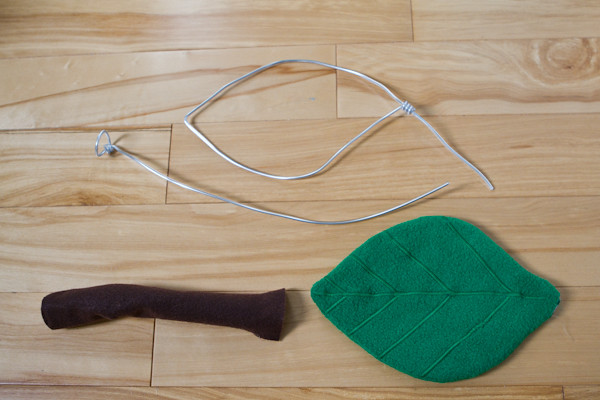
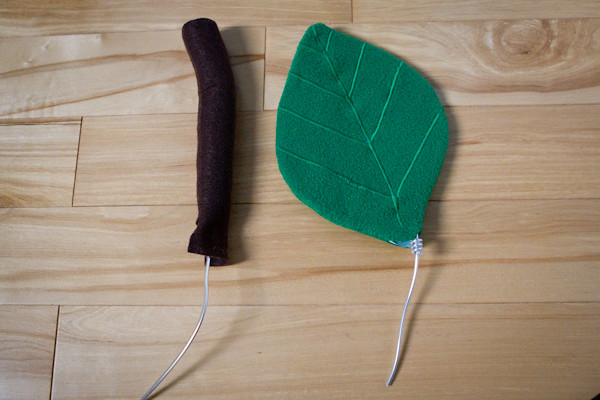
Another recommendation is to do coil wrap on the bottom part of the leaf.
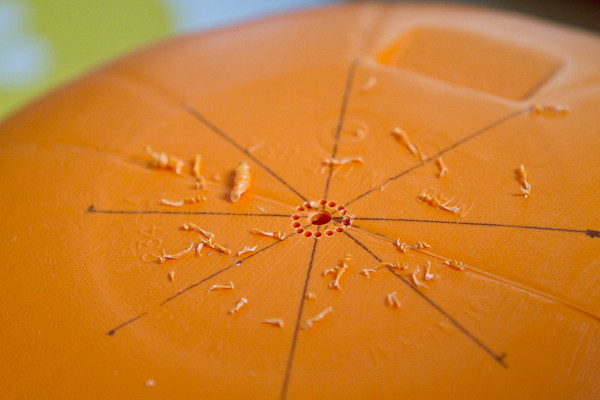
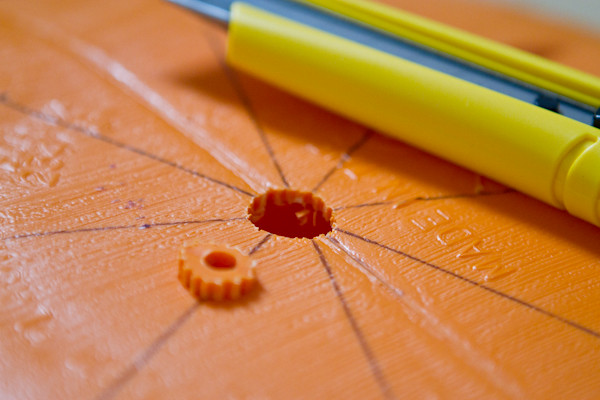
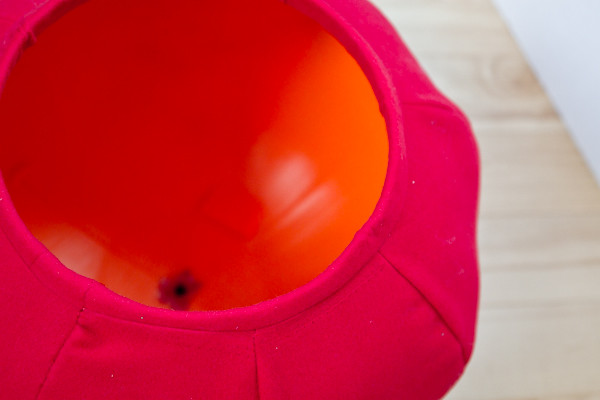
I needed a hole on top of the bucket so I used power drill and x-acto knife for it.
X-acto knife was used to shave off the rough edges.
The hole is needed to thread through the red fabric, leaf, and stem when it's time to assemble.
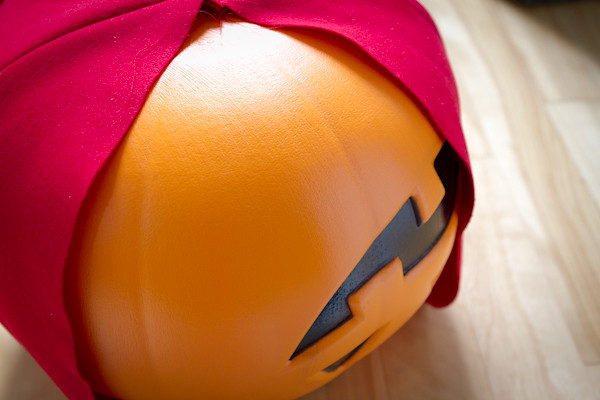
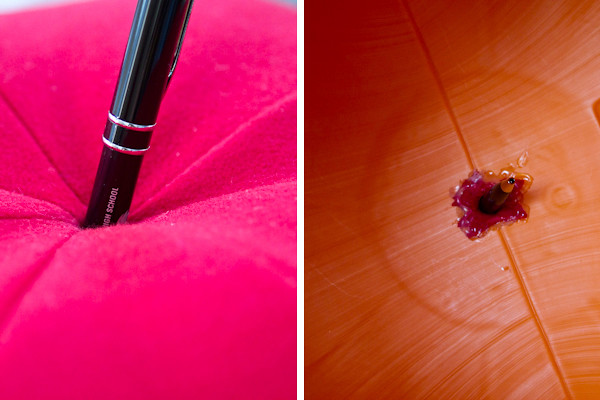
With excess red fabric, thread through the whole and pierce with pen or any thick dowel to create a form and to keep it stable.
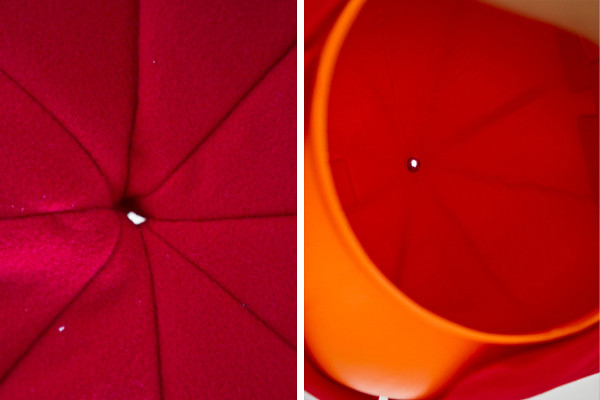
Use glue gun to glue down the excess ref fabric inside the bucket to secure. Once it's dry, you'll have clean finish of the red fabric attach to the bucket.

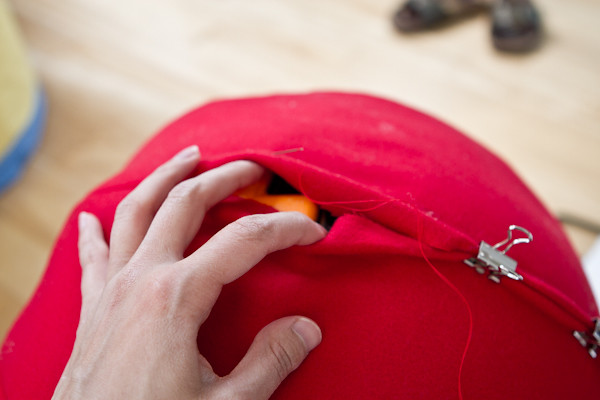
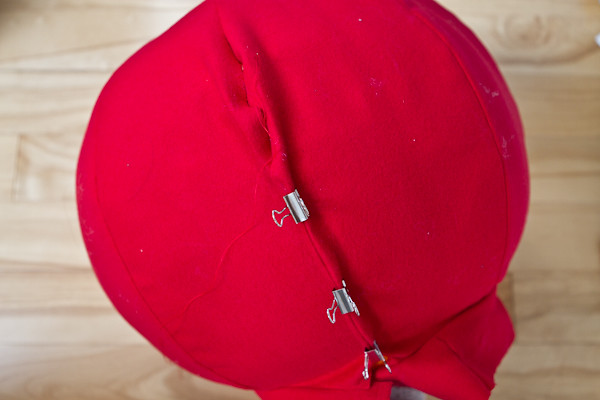
Now to close up the red fabric wrapped around the bucket.
Use paper clip to hold the 2 ends of the fabric and stitch it up.
As option, you can also stuff cotton in to add more form of the apple shape.
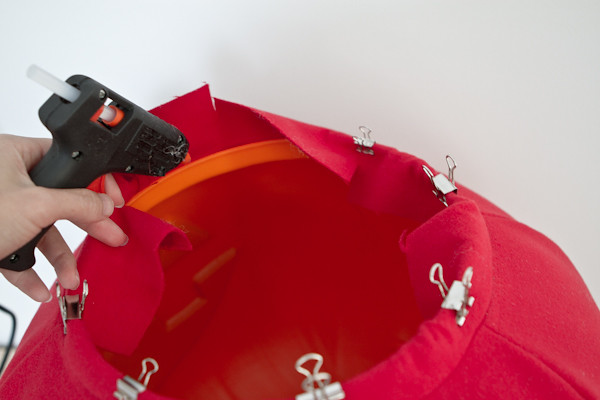
Use the glue gun to seal the trim.
First coat was around the rim, then the rest of the excess fabric is glued down further in.
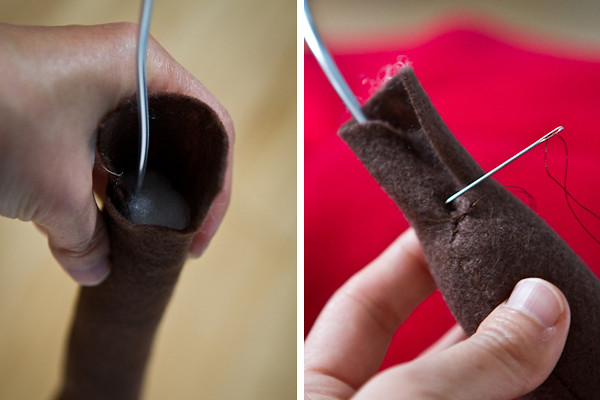
This is same step as making the leaf.
I've also zig-zag stitched this too to give a more iron-on-patch look.
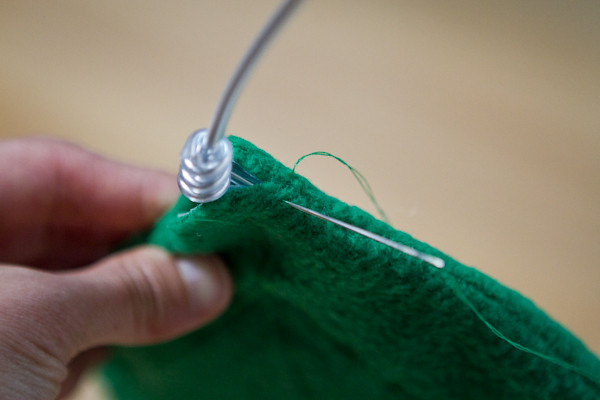
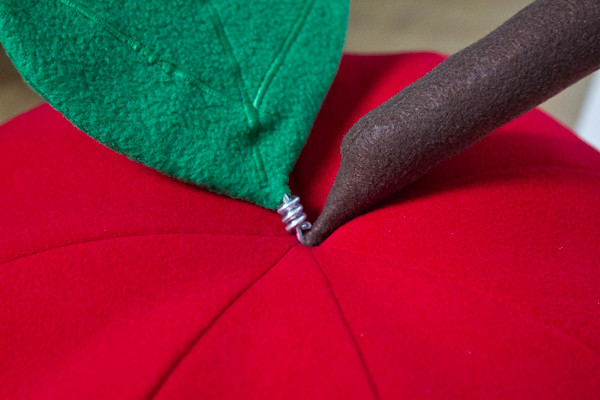
Earlier, I mentioned about recommending to do coil wrap on the leaf. To assemble, thread through the stem into the apple first and then thread the leaf.
The coil wrap will thread through the hole, making clicking noise and it'll "cap" the hole nice and secured.
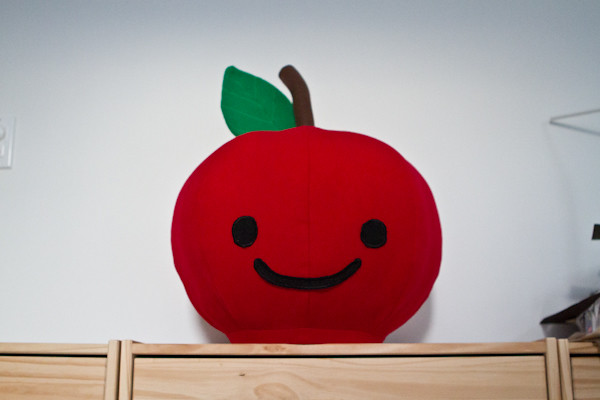
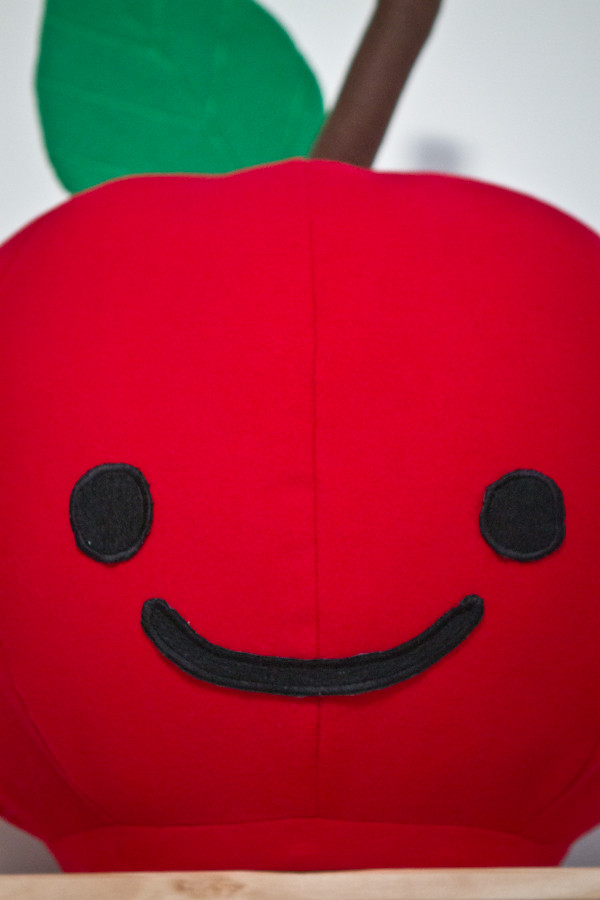
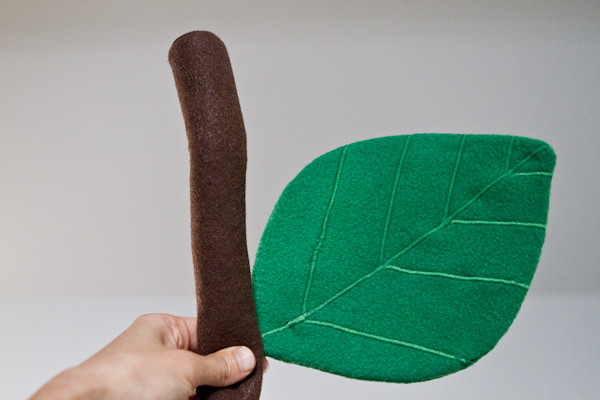
And this is the project I worked on!

I generally don't like to show my face in public so I've been wanting to make a coverup mask for any photos that I'm in.
Originally I wanted to do papercraft apple head where I was ready to make. But luckily I found another alternative to make this apple head!
I found this jack-o-lantern bucket at Target for $6US.
The bucket hole can fit through my head so this was perfect bucket to make apple head project!
Materials:
- 1m red fabric
- 1/2m green fabric
- 1 sheet of black felt
- 1 sheet of brown felt
- 1 jack-o-lantern treat bucket
Other materials:
- sewing machine
- stitching needle
- sewing thread
- fabric adhesive sheet
- craft wires
- power drill
- glue gun
- x-acto knife
- fabric chalk
- paper clips
- cotton
To make sphere, I had 8 pieces of flower petal shape and sewed together. I made up the pattern so I had to constantly check if it was wrapping correctly.
Have 2 cut outs of leaf shape.
Used fabric adhesive sheet on green fabric, drew and stitched to mark where I want the embroidery to be.
Left Image is the final result of the stitchery looks like, following the marking earlier. I used the default zig-zag stitch setting on sewing machine so some area looks wonky.
Right Image is when 2 pieces of leaf stitched together and how the embroidery looks like from the back side.
I used craft wires to keep the form without crushing it. The wire I used was super soft flexible wires so they will snap if you keep bending it on same spot few times.
I would recommend to put any wire through these stem and leaf so you have full flexibility to adjust when you put everything together.
Another recommendation is to do coil wrap on the bottom part of the leaf.
I needed a hole on top of the bucket so I used power drill and x-acto knife for it.
X-acto knife was used to shave off the rough edges.
The hole is needed to thread through the red fabric, leaf, and stem when it's time to assemble.
With excess red fabric, thread through the whole and pierce with pen or any thick dowel to create a form and to keep it stable.
Use glue gun to glue down the excess ref fabric inside the bucket to secure. Once it's dry, you'll have clean finish of the red fabric attach to the bucket.
Now to close up the red fabric wrapped around the bucket.
Use paper clip to hold the 2 ends of the fabric and stitch it up.
As option, you can also stuff cotton in to add more form of the apple shape.
Use the glue gun to seal the trim.
First coat was around the rim, then the rest of the excess fabric is glued down further in.
This is same step as making the leaf.
I've also zig-zag stitched this too to give a more iron-on-patch look.
Earlier, I mentioned about recommending to do coil wrap on the leaf. To assemble, thread through the stem into the apple first and then thread the leaf.
The coil wrap will thread through the hole, making clicking noise and it'll "cap" the hole nice and secured.
And this is the project I worked on!
Subscribe to:
Posts (Atom)


